Tao + Wry = Tauri 는 웹 기반 데스크톱 어플리케이션 개발 오픈소스 프레임워크로 Electron 의 대안으로 언급되며, Rust를 백엔드로 사용하여 신뢰성/보안성을 높였다는 평가와 더불어 브라우저를 같이 배포할 필요가 없이 설치된 WebView를 사용하는 구조라 배포 파일 사이즈가 Electron과 비교하여 매우 작다.
로드맵에 계획이 있긴 하지만 아직 모바일 개발은 지원하지 않고, 관련한 프로젝트나 커뮤니티등 리소스가 타 프레임워크에 비해 아직 많이 부족하다.

준비 (Windows 10 기준)
1. Microsoft Visual Studio C++ Build Tools
- Build Tools for Visual Studio 2022
- MSVC VS C++ build tools
- Windows 10 SDK or Windows 11 SDK.
2. WebView2
WebView2 runtime install 여부 확인 후, 없으면 Evergreen Bootstrapper WebView2 runtime 다운로드 설치.
Windows 10 Version 1803 이상, Windows 11 에는 기본 제공.
- Registry 체크 (PowerShell 이용)
- runtime 존재할 시, 둘중에 하나는 버전 출력. ex.)
112.0.1722.58 - 둘다 경로를 찾지 못하거나, 출력 value가
null,empty string또는0.0.0.0이면 runtime install 필요.
- runtime 존재할 시, 둘중에 하나는 버전 출력. ex.)
PS> Get-ItemPropertyValue -Path 'HKLM:\SOFTWARE\WOW6432Node\Microsoft\EdgeUpdate\Clients\{F3017226-FE2A-4295-8BDF-00C3A9A7E4C5}' -Name pv
PS> Get-ItemPropertyValue -Path 'HKCU:\Software\Microsoft\EdgeUpdate\Clients\{F3017226-FE2A-4295-8BDF-00C3A9A7E4C5}' -Name pv
3. Rust
- https://www.rust-lang.org/tools/install 에서
rustup설치. - 또는, PowerShell에서
winget install --id Rustlang.Rustup
> rustup toolchain listRust toolchain이 stable-msvc로 설정되어 있는지 확인.
> rustup default stable-msvc다른 toolchain이라면, stable-msvc로 설정.
4. Tauri CLI
npm, Yarn, pnpm, Cargo 중 선택하여 설치. Cargo 선호됨. 5~6분 소요.
여기서는 CLI 설치 및 프로젝트 작성에 Cargo 사용.
> cargo install tauri-cli프로젝트 생성 (Vanilla)
create-tauri-app 이용
> cargo install create-tauri-app템플릿 생성 도구인 create-tauri-app 설치.
> cargo create-tauri-app
    ? Project name (tauri-app) ›
      TypeScript / JavaScript  (pnpm, yarn, npm)
    ❯ Rust
    ? Choose your UI template ›
    ❯ Vanilla
      Yew
      Leptos
      Sycamore
프로젝트 이름, 빌드툴, 프론트엔드 선택 후 템플릿 생성.
│  .gitignore
│  README.md
│
├─.vscode
│      extensions.json
│
├─src
│  │  index.html
│  │  main.js
│  │  styles.css
│  │
│  └─assets
│          javascript.svg
│          tauri.svg
│
└─src-tauri
    │  .gitignore
    │  build.rs
    │  Cargo.toml
    │  tauri.conf.json
    │
    ├─icons
    │      128x128.png
    │      128x128@2x.png
    │      32x32.png
    │      icon.icns
    │      icon.ico
    │      icon.png
    │      Square107x107Logo.png
    │      Square142x142Logo.png
    │      Square150x150Logo.png
    │      Square284x284Logo.png
    │      Square30x30Logo.png
    │      Square310x310Logo.png
    │      Square44x44Logo.png
    │      Square71x71Logo.png
    │      Square89x89Logo.png
    │      StoreLogo.png
    │
    └─src
            main.rs
생성된 템플릿 파일 구조.
> cargo tauri dev해당 프로젝트 폴더로 이동하여 빌드 및 실행.
tauri-cli 이용
create-tauri-app이 Rust의 cargo new처럼 프로젝트 폴더와 기본 템플릿을 생성한 반면, 프로젝트 폴더를 생성하고 프론트엔드로 사용할 파일들의 위치를 지정해 주어야 한다.
> mkdir hello_tauri
> cd hello_tauri
> mkdir ui
> cargo tauri init
  ✔ ? What is your app name? · hello_tauri
  ✔ ? What should the window title be? · Hello Tauri
  ✔ ? Where are your web assets (HTML/CSS/JS) located, relative to the "<current dir>/src-tauri/tauri.conf.json" file that will be created? · ../ui
  ✔ ? What is the url of your dev server? · ../ui
  ✔ ? What is your frontend dev command? ·
  ✔ ? What is your frontend build command? ·
placeholder로 What is your frontend dev command? 는 npm run dev, What is your frontend build command?는 npm run build가 디폴트로 나오는데, cargo를 이용한 vanilla 개발에서는 지우고 공백으로 입력.
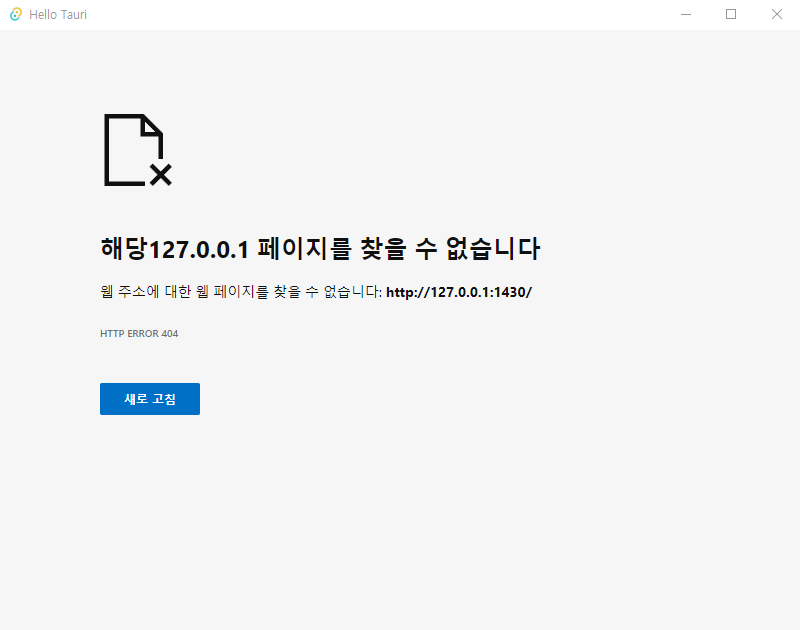
> cargo tauri dev실행하면, 아직 ui 폴더에 작성한 파일이 없기 때문에 에러화면 출력.
디지털 시계 만들기
HTML, CSS, Javascript 만으로 표현되는 시계와 Rust <--> Javascript 통신 기능을 이용하는 시계 작성.
> mkdir digital_clock
> cd digital_clock
> mkdir ui
> cargo tauri init
  ✔ ? What is your app name? · digital_clock
  ✔ ? What should the window title be? · Digital Clock
  ✔ ? Where are your web assets (HTML/CSS/JS) located, relative to the "<current dir>/src-tauri/tauri.conf.json" file that will be created? · ../ui
  ✔ ? What is the url of your dev server? · ../ui
  ✔ ? What is your frontend dev command? ·
  ✔ ? What is your frontend build command? ·
ui 폴더내에 index.html, style.css, index.js 파일 작성.
Rust <--> Javascript 통신
Javascript --> Rust commands
ui\index.js
function show_clock() {
    window.__TAURI__.invoke('show_clock')
}
window.__TAURI__.invoke() 형식으로 Rust 펑션 호출.
src-tauri\src\main.rs
#[tauri::command]
fn show_clock() {
    println!("show_clock invoked.");
}

fn main() {
    tauri::Builder::default()
    .invoke_handler(tauri::generate_handler![show_clock])
    .run(tauri::generate_context!())
    .expect("error while running tauri application");
}
#[tauri::command] 매크로가 해당 Rust 펑션과 프론트엔드와의 통신을 가능하게 함. invoke_handler(tauri::generate_handler!)를 Builder에 추가하여 해당 펑션을 tauri에게 알려줌.
src-tauri\tauri.conf.json
{
  "build": {
    "beforeDevCommand": "",
    "beforeBuildCommand": "",
    "devPath": "../ui",
    "distDir": "../ui",
    "withGlobalTauri": true
  },
withGlobalTauri 옵션을 추가하여 pre-bundled Tauri APIs 사용.
Rust --> Javascript events
event api를 이용하여 Rust <--> Javascript 간 통신 가능. sender: emit, recevier: listen
src-tauri\src\main.rs
use tauri::Manager;

#[tauri::command]
fn show_clock(wnd: tauri::Window) {
  println!("local time: {}", get_date());
  std::thread::spawn(move || {
    loop {
      wnd.emit("emit_to_js", get_date()).unwrap();
      std::thread::sleep(std::time::Duration::from_secs(1))
    }
  });
}
tauri::Manager : emit, listen 등을 사용하기 위한 Rust trait.
thread를 이용하여 1초당 Date/Time 정보를 Javascript에 emit_to_js 이름으로 전달.
ui\index.js
async function from_rust() {
  await window.__TAURI__.event.listen('emit_to_js', event => {
    clock_rust.textContent = event.payload;
  });
}
from_rust();

const clock_rust = document.querySelector('.clock_rust');
비동기로 Rust의 emit 신호 기다림. event.payload에 데이터 전달.
invoke처럼 Javascript --> Rust 통신도 가능.
ui\index.js
function emit_clock() {
  window.__TAURI__.event
    .emit('emit_to_rust')
}
src-tauri\src\main.rs
fn main() {
  tauri::Builder::default()
    .setup(|app| {
        let _id = app.listen_global("emit_to_rust", |_event|{
          println!("emit_to_rust")
        });
      Ok(())
    })
    .run(tauri::generate_context!())
    .expect("error while running tauri application");
}
ref. https://tauri.app/v1/references/architecture/inter-process-communication/
전체 코드 작성
ui\index.html
<!DOCTYPE html>
<html lang="en">
  <head>
    <meta charset="UTF-8" />
    <meta name="viewport" content="width=device-width, initial-scale=1.0" />
    <title>Digital Clock</title>
    <link rel="stylesheet" href="style.css">
  </head>
  <body>
    <div class="container">
      <div class="row">
        <p>Vanilla :</p>
        <div class="clock_html"></div>
      </div>
      <div class="row">
        <button id="show_button" onclick="show_clock()">Show Rust Clock</button>
        <div class="clock_rust"></div>
      </div>
    </div>

    <script src="index.js"></script>
  </body>
</html>
Show Rust Clock 버튼을 클릭하면, Javascript 에서 Rust 펑션 호출.
ui\style.css
* {
  margin: 0;
  padding: 0;
}
.container {
  margin: 0;
  padding-top: 10vh;
  display: flex;
  flex-direction: column;
  justify-content: center;
  text-align: center;
  font-family: arial;
  font-size: 2rem;
}
.row {
  display: flex;
  justify-content: center;
}
.clock_html {
  color: black;
}
.clock_rust {
  color: gray;
}
ui\index.js
function show_clock() {
  button.disabled = true;
  emit_clock();
  window.__TAURI__
    .invoke('show_clock')
}

function emit_clock() {
// emit event test
  window.__TAURI__.event
    .emit('emit_to_rust')
}

async function from_rust() {
  await window.__TAURI__.event.listen('emit_to_js', event => {
    clock_rust.textContent = event.payload;
  });
}
from_rust();

const button = document.getElementById("show_button");
const clock_html = document.querySelector('.clock_html');
const clock_rust = document.querySelector('.clock_rust');

function getTime() {
  let d = new Date();
  offset = d.getTime() - (d.getTimezoneOffset() * 1000 * 60); //millisecond
  let date = new Date(offset);

  clock_html.textContent = date.toISOString().substring(0, 19).replace('T', ' ');
}

setInterval(getTime, 1000);
getTime();
src-tauri\src\main.rs
#![cfg_attr(
  all(not(debug_assertions), target_os = "windows"),
  windows_subsystem = "windows"
)]

use chrono::{Local, DateTime};
use tauri::Manager;

#[tauri::command]
fn show_clock(wnd: tauri::Window) {
  println!("local time: {}", get_date());
  std::thread::spawn(move || {
    loop {
      wnd.emit("emit_to_js", get_date()).unwrap();
      std::thread::sleep(std::time::Duration::from_secs(1))
    }
  });
}

fn get_date() -> String {
  let local: DateTime<Local> = Local::now();
  local.format("%Y-%m-%d %H:%M:%S").to_string()
}

fn main() {
  tauri::Builder::default()
    .setup(|app| {
        let _id = app.listen_global("emit_to_rust", |_event|{
          println!("emit_to_rust")
        });
      Ok(())
    })
    .invoke_handler(tauri::generate_handler![
      show_clock,
    ])
    .run(tauri::generate_context!())
    .expect("error while running tauri application");
}
Rust의 Date/Time을 위해 chrono 라이브러리 사용.
src-tauri\Cargo.toml
[dependencies]
serde_json = "1.0"
serde = { version = "1.0", features = ["derive"] }
tauri = { version = "1.2.4", features = [] }
chrono = "0.4"
chrono 라이브러리 사용을 버전과 함께 지정.
src-tauri\tauri.conf.json
"build": {
    "withGlobalTauri": true

"identifier": "com.devlife.digitalclock",

"windows": [
      {
        "fullscreen": false,
        "height": 150,
        "resizable": true,
        "title": "Digital Clock",
        "width": 650
      }
    ]
pre-bundled Tauri api 사용을 위해 withGlobalTauri 추가.
배포용 릴리즈 cargo tauri build 를 위해서는 identifier를 유니크한 네임으로 변경.
width, height 값으로 윈도우 창 사이즈 변경.
빌드
> cargo tauri dev개발 빌드
> cargo tauri build배포 빌드
배포 빌드에서는 src-tauri\target\release\bundle\msi 폴더에 .msi 설치 파일을 생성하는데, 설치 시 WebView2 runtime 설치 여부를 체크하여, 없으면 Bootstrapper WebView2 runtime을 다운로드하여 설치한다. 아래 참고.
src-tauri\target\release\wix\x64\main.wxs
<!-- WebView2 -->
<Property Id="WVRTINSTALLED">
<RegistrySearch Id="WVRTInstalledSystem" Root="HKLM" Key="SOFTWARE\Microsoft\EdgeUpdate\Clients\{F3017226-FE2A-4295-8BDF-00C3A9A7E4C5}" Name="pv" Type="raw" Win64="no" />
<RegistrySearch Id="WVRTInstalledUser" Root="HKCU" Key="SOFTWARE\Microsoft\EdgeUpdate\Clients\{F3017226-FE2A-4295-8BDF-00C3A9A7E4C5}" Name="pv" Type="raw"/>
</Property>
<CustomAction Id='DownloadAndInvokeBootstrapper' Directory="INSTALLDIR" Execute="deferred" ExeCommand='powershell.exe -NoProfile -windowstyle hidden try [\{] [\[]Net.ServicePointManager[\]]::SecurityProtocol = [\[]Net.SecurityProtocolType[\]]::Tls12 [\}] catch [\{][\}]; Invoke-WebRequest -Uri "https://go.microsoft.com/fwlink/p/?LinkId=2124703" -OutFile "$env:TEMP\MicrosoftEdgeWebview2Setup.exe" ; Start-Process -FilePath "$env:TEMP\MicrosoftEdgeWebview2Setup.exe" -ArgumentList ('/silent', '/install') -Wait' Return='check'/>
<InstallExecuteSequence>
<Custom Action='DownloadAndInvokeBootstrapper' Before='InstallFinalize'>
<![CDATA[NOT(REMOVE OR WVRTINSTALLED)]]>
</Custom>
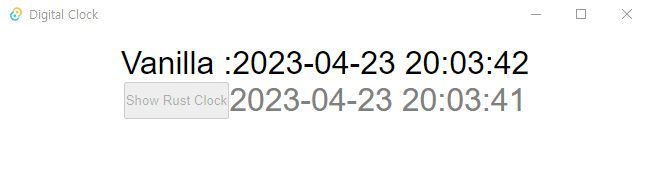
</InstallExecuteSequence>실행 화면
댓글